If you're completely new to localization under Haiku, please read the very basic blog Localizing an application. Also see the Haiku Book and maybe search for examples in Haiku the tree with OpenGrok.
Quick links to the sections in this document:
- Overview
- Adding a project
- Uploading existing xx.catkeys (translations)
- Updating en.catkeys
- Exporting translated xx.catkeys
- Tips
- TL;DR (catkeys)
 Overview
The whole localization business hinges around the en.catkeys that are collected from a project's source files.
Polyglot manages the strings of a project's en.catkeys in a database. Translated strings get added as a field to the English original as they arrive from the web interface.
Catkeys have no concept of the history of a particular string, so there is no "update" when a string in the en.catkeys changes:
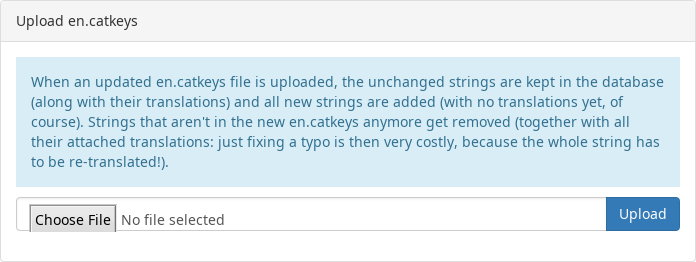
When an en.catkeys file is uploaded, the unchanged strings are kept in the database (along with their translations) and all new strings are added (with no translations yet, of course).
Strings that aren't in the new en.catkeys anymore get removed (together with all their attached translations: just fixing a typo is then very costly, because the whole string has to be re-translated!).
Notable exception: If the English original only has whitespace or capitalization changes, Polyglot won't drop the whole string, but update the English original and keep the translation and marks it as Needs work.
When all the languages you need are 100% finished, you can export and download their xx.catkeys to use when building your application.
Non-catkeys translations
Polyglot can be used for the translation of other files than Haiku catkeys:
Line separated files are any text files where the to-be-translated text blocks are separated by lines with certain characters (e.g. a #) or just an empty line. As an example, see an export of the tips files of Tipster here at Polyglot. ReadMe texts and other documentation are other candidates for this type of file.
Java properties are used by Java projects to assign a translatable text to a specially named variable. As an example, see an export of the WebMessages file of HaikuDepotServer here at Polyglot.
Adding a project
Simply enter the new project name into the Add project text box on the Polyglot start page, click Add and it'll appear in the list of projects. Click on it and you get to the Translation modules page of your project:
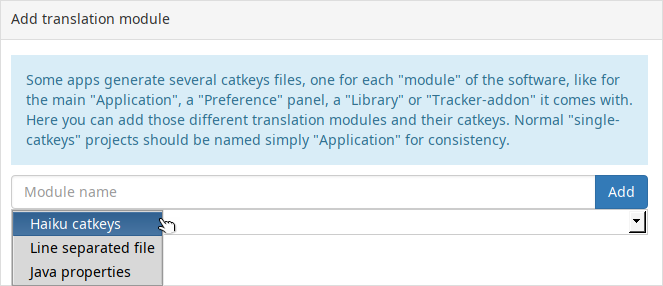
Here you enter the name of the translation module you want to add. If it's for the main part of your app it should be called simply "Application". Then you choose the kind of file (Haiku catkeys, line-separated, or Java properties) from the pop-up menu and click on "Add".
You arrive at a page to upload the English original for the added module (here for a catkeys module):
After you've uploaded a file, you'll see for all kinds of files:
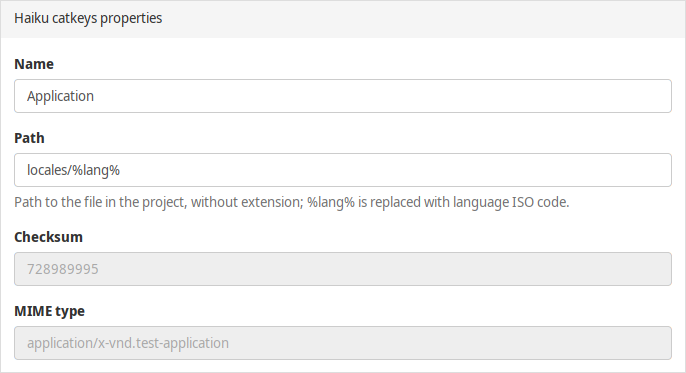
- Name - the name of the translation module.
- Path - the path that'll be used in the ZIP archive that's generated when exporting all languages.
Additionally for Haiku catkeys:
- Signature - the signature of the application, as read from the uloaded en.catkeys file.
- Checksum - the checksum which changes every time you create a new en.catkeys with changed GUI strings.
Additionally for line-separated files:
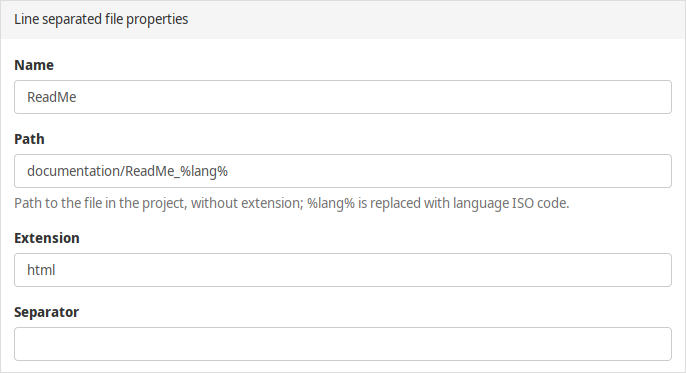
- Extension - the file extension of the uploaded file.
- Separator - the characters used to separate translation blocks. Leave empty to use an empty line.
Under all that follows the contents of your uploaded file.
If your project only uses a single en.catkeys file that contains all the strings, you're done now. If you use several en.catkeys to build your software, maybe for a "Preferences panel", a "Tracker add-on", and a "Library", you need several "Translation modules" and need to repeat these steps and add the appropriate identifying names and upload their en.catkeys (or line-separated files, or Java properties).
Uploading existing, already translated files
If you already have some (partially) translated xx.catkeys (or line-separated files, or Java properties), you can upload those too: Just like your translating collegues, you click on your project on the start page, and then on the Continue or All text blocks link of each language you have already translated files for.
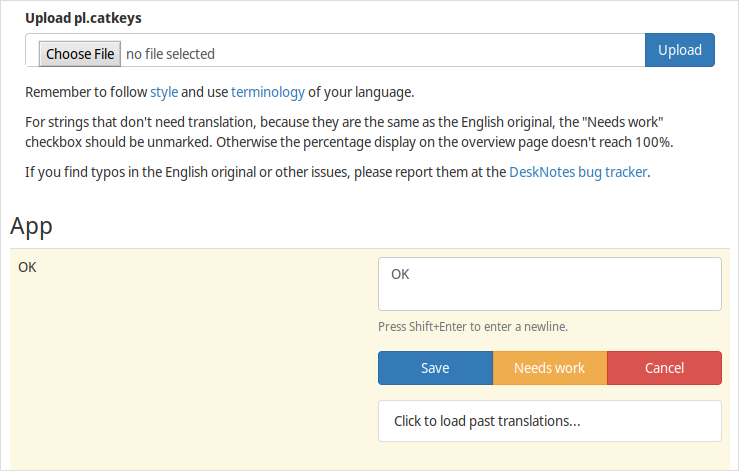
At the top, you can now upload the translated file for that language.
When you read the info box, you see that you now have to deactivate the Needs work button and click Save for all strings that didn't need translation, because they are the same as the English original. Depending on the language, this is quite common e.g. for OK buttons or the name of the application.
Uploading translated files has no effect on English original. Changes always go from the original to the translations, never the other way around.
If the uploaded translated file is outdated and contains additional, now obsolete strings, those strings are simply discarded. Only strings that have the counterpart of their English original in Polyglot's database are imported.
Updating the English original file
It's practically the same as when you created your new project.
You click on your project on the start page to get to your Translation modules page and then click on the Edit link of the identifying name (default "Application") and you're back where you can upload an English original file.
You can return to this page anytime you need to upload a new version of your English original file. Remember from the "Overview" section though: uploading a new original file will lose already translated strings, if their English original string has changed. Don't wear out your translators...!
Exporting translated files
On the Translation modules page, each language has an Export item in the Continue menu beside its progress bar. With it you download the translated file of that particular language. To download a ZIP archive containing all languages (with the folder hierarchy defined in the "Path" text field), click on the Export all at the bottom of the list of languages on that page.
Tips
As said before, be careful not to needlessly update the English original. Removing or adding completely new strings don't impact translations at all, so those are always OK. Though, it may be wise to do those in batches as well, or translators will see the progress meter of their language keep dropping below 100% every time, and may feel some frustration...
If you fixed a typo in an English string or some other error that doesn't impact any translation, be aware that uploading this English orignal file would remove the "old" string and all its translations.
First check if that string has been translated at all yet. If not, nothing will be lost.
Otherwise, you could download all translated files, do a find & replace to correct the typo in all of them (Pe can do that for all files in a folder or open windows), and upload them all.Generally, one should aim for having the fewest disruptions possible, as with a growing number of maintained languages, the needed workload increases.
Try to start translations only after the GUI code has settled down and maybe even only after an English-only pre-release of your software.
Do changes in batches.
Do typo-like changes over all files yourself and upload the results.
For catkeys, use variables/constants in your code that replace with theString.ReplaceFirst() to avoid something like changing copyright years in the AboutWindow, for example.
TL;DR (catkeys)
Getting a catkeys project going, in a nutshell:
- Read at least the "Overview" on this page. :)
- Add a new project.
- Add "Translation modules" for the different parts of your app that create en.catkeys (often just one en.catkeys file is used, default name "Application").
- Upload the en.catkeys.
- Add all existing translated xx.catkeys on the Translation modules page of each language you got. Un-set the Needs work checkbox and click Save for those strings that didn't need translation, because they are the same as the English original, e.g. often for OK buttons.
- Uploading a new en.catkeys file impacts the translations (items get added or removed, including already translated strings!). Uploading translations (xx.catkeys) doesn't impact the en.catkeys.
- Export the translated xx.catkeys for the languages that you need when their translations are finished.